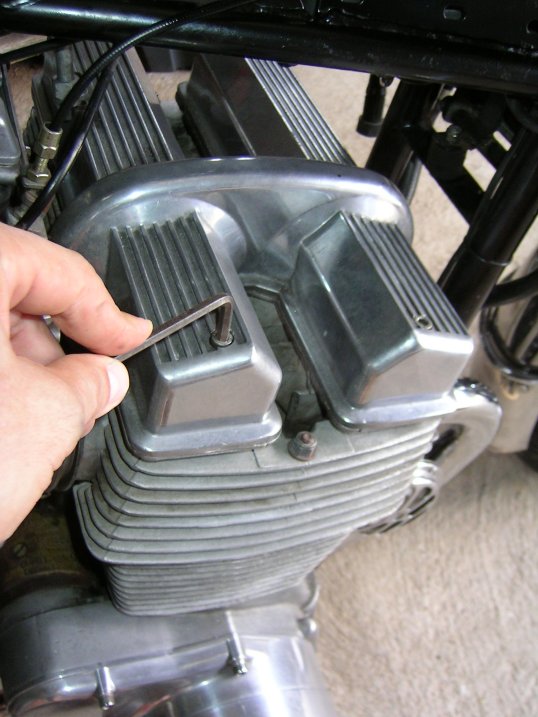
Removing
the cam cover
Cam
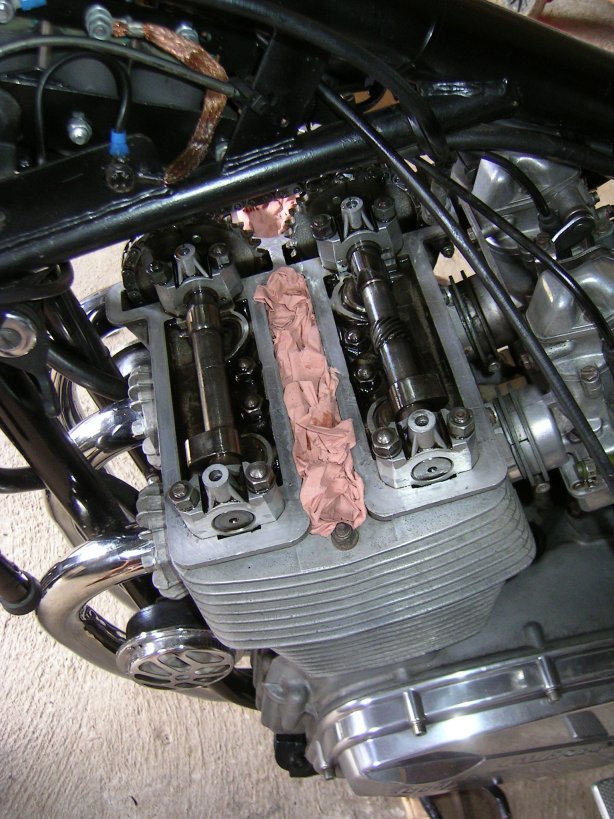
cover, spark plugs and ignition cover are removed. Spark plugs holes closed with
rag paper.
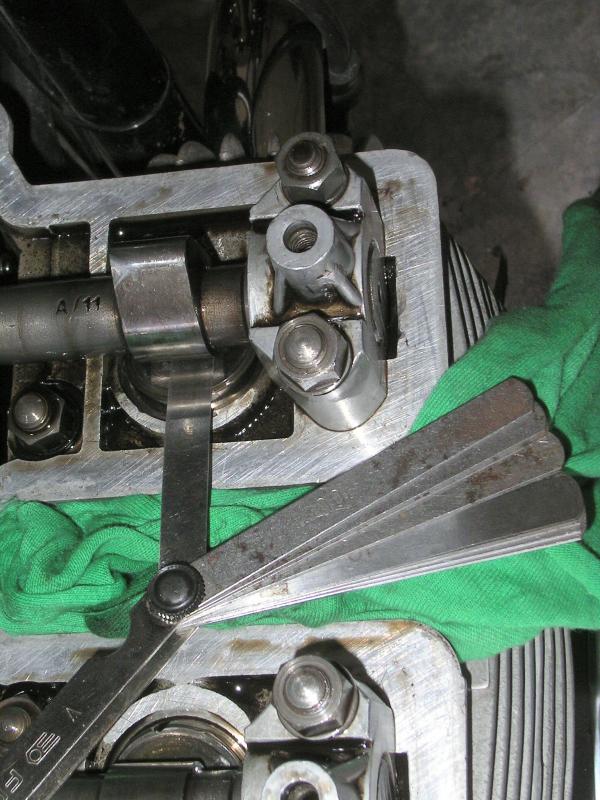
Checking
the clearance on the back of the lobes with gauges.
DIY #1
Check
and set the valve clearance- Laverda 1000 and 1200
(Click
on the pictures to enlarge)
CHECK THE CLEARANCE :
-
Remove the cam cover loosening the 6 Alen screws. Be aware to keep the 6 copper
washers.
- Remove the ignition cover. Put a 32mm spanner on the crank nut
and turn it by hand.
- Remove the spark plugs, close the holes with rag paper.
- Turn the crank until you can check the clearance of each valve (on the back
of the lobes)
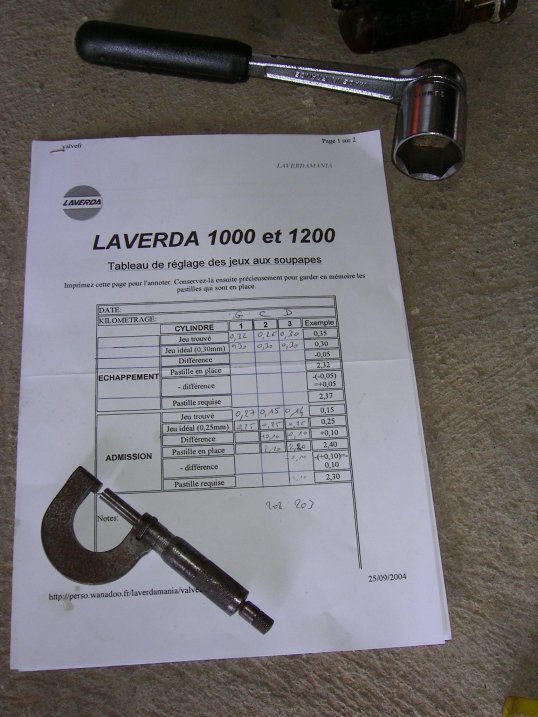
- Write the clearances found on the
special sheet (you can print it)
(Click on the pictures to enlarge)
| |
|
|
| Removing
the cam cover | Cam
cover, spark plugs and ignition cover are removed. Spark plugs holes closed with
rag paper. | Checking
the clearance on the back of the lobes with gauges. |
SET THE CLEARANCES:
- Turn the crank until the chain clip comes beetween the two cam sprockets.
- Close the chain
tunnel with rag paper
- Remove the chain tensionner
- Put a steel wire to the two chain ends and fix the steel wire to the frame (in
order to not drop the chain in the engine)
- Remove the chain clip
- Turn
the crank until the cams loose tension of the chain (this occurs when the timing
mark are correct)
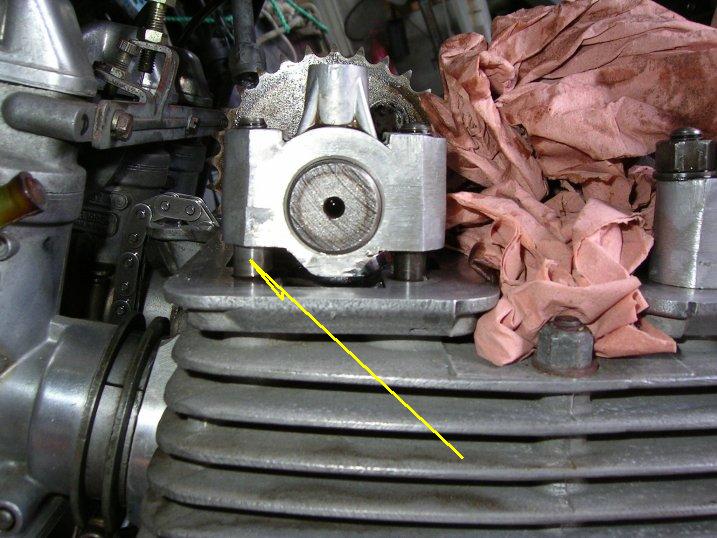
- Remove the cam plain bearings, the central first, then
remove the cams/external bearings. Put all the parts in the right order on a table,
don't mix them
- Check the cams, lobes and buckets: No scratches or blueing.
- Remove the buckets, get the shims and measure them. Put them in the right
order, don't mix them.
- Write the shims thickness on the special printeable
sheet then calculate the correct new shims to get the correct clearance.
-
Put on the right shims, the buckets, the cams and plain bearings in the right
order, tighten to the correct torque. Be aware to put the bearings in the right
sense, the oil orifice must be in front of the lobes.
- Before
fitting the chain, turn the cams with a big screwdriver and check again the clearance
- If all correct, time the cams, fit the chain and the chain clip (the clip must
be in the opposite sense of the engine running sense)
- Turn the crank for
at least 2 engine cycles and check again the correct timing
- Put the chain
tensionner and set the chain tension (5mm under a weight of 2 kg applied beetween
the two cam sprockets)
- Lube the lobes, buckets and bearings.
- Put the
cam cover and its gasket (new if possible)
- Put the ignition cover.
(Click on the pictures to enlarge)
 |
 |
 |
| Removing
the central bearing. Don't loose the half ring (see arrow) |
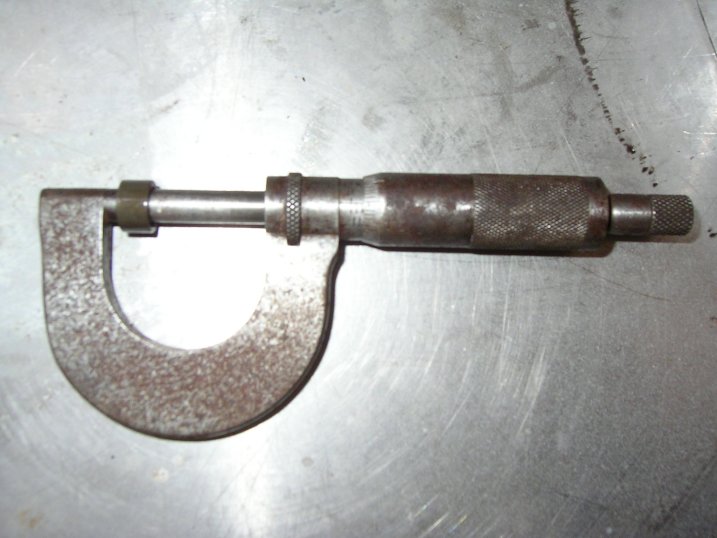
Use
a palmer gauge to measure the shims |
A
tricky way: Write the thicknesses directly on the shims with a CD-writer pencil. This will help later. |
 |
 |
 |
| A
special printeable sheet is available in this site to calculate the correct shims. |
Fit
the cams again, don't forget the centering bushes |
Tightening
the head nuts with a dyno spanner |
 |
 |
 |
| Timing
the chain (see arrows) | Cams
and chain in place | Set
the chain tension |
ADVICES:
-
If you replace the chain, be aware that some replacement new chains are a bit
shorter than originals. You can probably fit them but thet are still too tight.
Go for the original Regina chain (CH121)
- Don't use pieces of wood to maintain
the cam sprockets whe fitting the chain clip! With the correct Regina chain, no
need to use too much force!
- Keep the old shims, they will be useful later.
- No need to buy the whole set
of shims. It is very expensive and totally unecessary!
- Chain tension: Check
it at various crank positions.